Insights & Publications

Emteq Labs Blog & Scientific Updates

Explore the latest articles on optomyography (OCO™), facial expression sensing, XR biofeedback, and affective computing.

0%

Facial muscle activation mapping turns subtle facial movement into visible, analyzable information. It helps researchers, clinicians, designers, and aesthetic professionals observe which muscles engage, when they respond, and how strongly they move. A raised brow may involve more than one small contraction. A genuine smile can reach the eyes. The details matter.

Paul Ekman, a leading authority in facial expression research, said, “The face is the best place to observe emotion.” His work, including the Facial Action Coding System, shaped modern approaches to documenting facial actions. Yet observation alone is not enough. Reliable mapping requires consistent lighting, accurate landmarks, careful participant instructions, and awareness of individual anatomy. Facial muscle activation mapping should support evidence-based interpretation, not replace clinical judgment or personal consent.

This guide presents seven practical tips for creating clearer, more useful activation maps. It considers camera placement, baseline expressions, muscle regions, movement timing, and data quality. It also addresses common mistakes, such as confusing skin movement with muscle activity or treating one facial pattern as universal. No map is perfect. Human faces are not simple diagrams.

A small error can change the reading.

The strongest workflow combines technical measurement with thoughtful review. Use visible details, repeat observations, and question uncertain results. The goal is not to label every movement too quickly. It is to build a defensible picture of facial behavior, one controlled observation at a time.
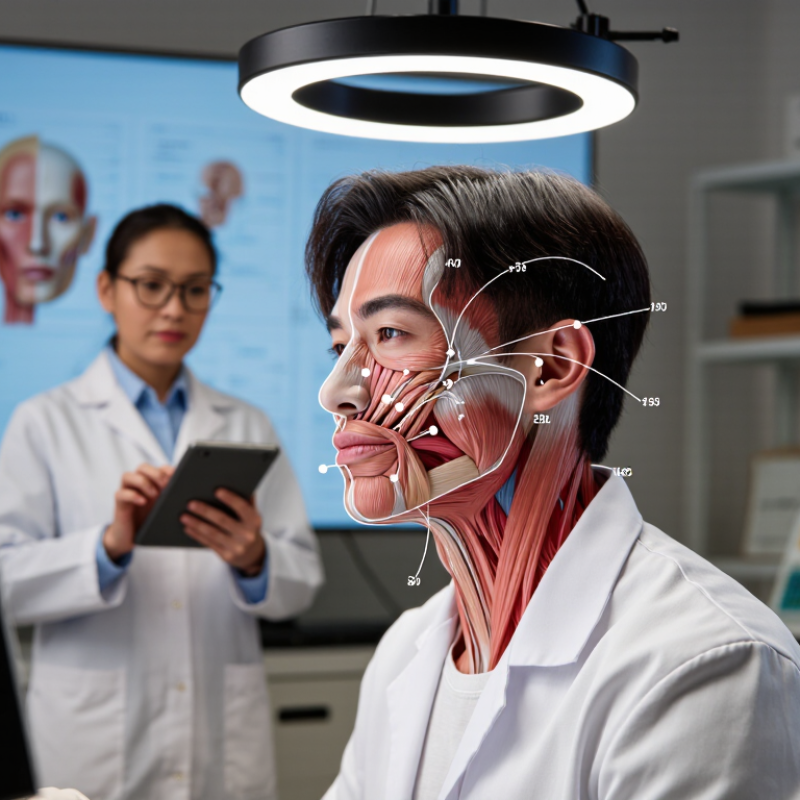
7 Tips for Facial Muscle Activation Mapping?

Defining Facial Muscle Activation Mapping and Its Practical Purpose

Facial muscle activation mapping shows which muscles engage, when they engage, and how strongly. It combines surface electromyography, video observation, and gentle palpation. The practical purpose is clear: clinicians can compare resting tension, smiling symmetry, blinking patterns, and recovery after injury. It also supports safer facial rehabilitation and more consistent aesthetic assessments. A 2023 ISAPS report recorded 34.9 million surgical and nonsurgical aesthetic procedures worldwide, highlighting the need for measurable facial evaluation.

Use seven careful habits during mapping. Tip 1: record a relaxed face first. Tip 2: capture the same expressions each time. Tip 3: place sensors symmetrically. Tip 4: check skin preparation and signal quality. Tip 5: compare movement with activation data. Tip 6: repeat unusual findings. Tip 7: document pain, fatigue, and emotional state. Small details matter. A raised eyebrow can hide unwanted forehead tension. A weak smile may reflect fatigue, not nerve impairment.

Interpretation requires trained judgment, not software alone. The American Academy of Neurology emphasizes clinical examination when assessing facial weakness and related neurological signs. Mapping should therefore support, not replace, diagnosis. Results can change with lighting, sensor pressure, caffeine, stress, or recent exercise. One session can mislead. That limitation deserves attention. A reliable protocol uses informed consent, consistent room conditions, calibrated equipment, and repeat measurements. The strongest map connects numbers with visible movement and the person’s own experience.

Preparing the Face, Tools, and Reference Points for Accurate Mapping

7 Tips for Facial Muscle Activation Mapping

Preparing the Face, Tools, and Reference Points for Accurate Mapping

Accurate facial muscle activation mapping begins before any sensor touches the skin. Clean, dry skin reduces signal noise and improves contact.

Tip 1: Ask about recent procedures, irritation, allergies, and resting discomfort.

Tip 2: Let the face relax for several minutes. Small tension can distort the baseline. I still recheck this step because people often clench without noticing.

Tip 3: Use calibrated, non-invasive recording equipment and inspect every cable before testing.

Tip 4: Keep lighting even and record the participant’s neutral expression.

Tip 5: Mark stable reference points, such as the facial midline, brow, outer eye corner, mouth corner, and jawline. Use the same points on both sides. Symmetry helps, but real faces rarely match perfectly. That matters.

Tip 6: Place sensors according to muscle direction, not just visible features. The skin may shift during smiling or speaking.

Tip 7: Record simple actions separately, including rest, gentle brow lifting, eye closure, smiling, and lip pursing. Give clear instructions and allow pauses between tasks. Avoid forcing movement. A strained expression can create misleading activation patterns. When results seem unusual, repeat the task, check placement, and document the change. Careful notes support reliable interpretation and make later comparisons more meaningful.

Identifying Major Facial Muscles Through Movement-Based Observation

Facial muscle activation mapping begins with movement, not assumptions. Ask the subject to raise the brows, close the eyes gently, smile, purse the lips, and depress the mouth corners. Watch the skin first. The frontalis creates horizontal forehead lines, while orbicularis oculi narrows the eyelids. The zygomaticus major lifts the mouth corners during a smile. The depressor anguli oris pulls them downward. These observations align with the Facial Action Coding System, which documents 44 visible facial action units (Ekman, Friesen, and Hager, 2002).

Small movements matter. A soft blink may activate orbicularis oculi without strong cheek motion. A forced smile can recruit several muscles and hide the primary mover. Surface electromyography research also shows that facial activation varies with task intensity, electrode placement, and individual anatomy. That makes visual mapping useful, but not perfectly objective. I have found that filming from the front and three-quarter angles reveals asymmetry more clearly than one fixed view.

Record the resting face before testing. Then compare each movement with the relaxed baseline. Use slow repetitions, consistent lighting, and neutral instructions. Mark visible changes around the brow, eyes, nose, lips, and chin. The 2023 ISAPS statistics report continued high demand for nonsurgical facial procedures, making precise anatomical observation increasingly relevant for qualified practitioners. Still, a visible crease does not prove one muscle acted alone. Facial expression is coordinated, layered, and sometimes surprisingly inconsistent.

7 Tips for Facial Muscle Activation Mapping? - Identifying Major Facial Muscles Through Movement-Based Observation
Tip Observation Focus Simple Movement Cue Primary Muscle or Muscle Group Visible Activation Pattern Useful Mapping Landmark Interpretation Note
1 Establish a relaxed baseline before asking for movement. Ask the person to sit upright, relax the jaw, and keep the face neutral for several seconds. All observable facial muscles; especially the orbicularis oculi, orbicularis oris, and frontalis. Resting symmetry, habitual tension, eyelid position, lip posture, and involuntary movements can be compared across later tasks. Compare the left and right sides of the forehead, eye openings, cheeks, and mouth corners. A baseline reduces confusion between resting tone and task-related activation. Facial asymmetry may have many causes and should not be diagnosed from observation alone.
2 Map forehead elevation and brow movement. Ask the person to raise the eyebrows and look surprised without opening the mouth. Frontalis, the forehead portion of the occipitofrontalis. Horizontal forehead wrinkles appear and the eyebrows move upward; the central and lateral forehead may not move identically. Observe the brow line and the direction of skin folds above the eyebrows. The frontalis elevates the eyebrows. Brow shape and wrinkle depth also vary with age, skin elasticity, and habitual expression.
3 Separate brow drawing from brow elevation. Ask the person to frown or draw the eyebrows toward the midline. Corrugator supercilii and procerus. Vertical or oblique glabellar lines develop between the eyebrows; the skin over the bridge of the nose may draw downward. Focus on the glabella, the area between and just above the eyebrows. Corrugator supercilii primarily draws the eyebrows medially and downward, while procerus contributes to downward movement of the medial brow and skin over the nose.
4 Identify controlled eyelid closure. Ask for a gentle blink, a firm eye squeeze, and then relaxation. Orbicularis oculi. The eyelids close and circular wrinkles may form around the lateral eye; stronger closure produces more pronounced skin compression. Observe the upper and lower eyelids and the lateral orbital region. The orbicularis oculi closes the eyelids. A gentle blink and forceful eye closure are different tasks and may recruit the muscle with different intensity.
5 Track cheek lifting and the nasolabial region. Ask the person to smile while keeping the eyes relaxed, then repeat with a natural smile. Zygomaticus major and zygomaticus minor, with contribution from other upper-lip elevators. The mouth corners move upward and laterally; the cheeks rise and the nasolabial folds become more visible. Follow the line from the cheekbone area toward the corner of the mouth. A smile is a coordinated expression involving multiple muscles. Movement of the mouth corner alone should not be attributed to one muscle with certainty.
6 Map lip closure, pursing, and protrusion. Ask the person to gently close the lips, purse them, and produce a rounded “oo” shape. Orbicularis oris, with assistance from the incisivus and surrounding perioral muscles. The lips narrow, seal, or project forward; the vermilion border changes shape as the mouth opening becomes smaller. Observe the upper and lower lip contour, philtrum, and mouth opening. Orbicularis oris forms the muscular sphincter around the mouth and helps close and shape the lips. Speech and emotion can recruit additional muscles.
7 Assess lower-face depression and lateral tension. Ask the person to pull the mouth corners downward, expose the lower teeth, or tighten the neck gently without straining. Depressor anguli oris, depressor labii inferioris, mentalis, and platysma. The mouth corners or lower lip move downward; the chin may wrinkle or elevate, and vertical neck bands may become more apparent. Inspect the mouth corners, chin prominence, lower lip, and superficial front of the neck. Several lower-face muscles can act together. Avoid excessive force, and interpret visible movement as a regional pattern rather than a definitive isolated muscle test.

Recording Activation Patterns With Consistent Facial Expressions

7 Tips for Facial Muscle Activation Mapping

Recording reliable facial activation begins with expression control. Ask participants to hold a neutral face for five seconds, then perform one expression for another five seconds. Use the same lighting, posture, camera distance, and verbal instruction each time. Facial movement is small, but its electrical signal can be surprisingly unstable. The SENIAM guidelines emphasize careful skin preparation, consistent electrode placement, and low-motion recording conditions. Marking locations with a washable grid can reduce daily placement errors.

Map muscles by function, not only by appearance. The Facial Action Coding System catalogs 44 action units, including brow lowering, lip tightening, and cheek raising. Pair these actions with surface electromyography channels near the frontalis, corrugator, zygomaticus, and orbicularis oris. A 2023 review in Psychophysiology reported that facial electromyography protocols often use sampling rates between 500 and 2,000 Hz. I prefer 1,000 Hz when equipment allows. It captures quick changes without creating unnecessary data.

Clean each signal before interpretation. Remove movement artifacts, inspect baseline drift, and compare activation with each person’s neutral reference. Do not treat one sharp peak as proof of stronger emotion. My first maps looked precise, but repeated trials exposed electrode shifts and jaw tension. That mistake mattered. Record at least three trials per expression, then report the median pattern, trial variability, electrode locations, and excluded segments. Transparent records make the map more useful than attractive colors.

Interpreting Mapping Results for Assessment, Training, or Rehabilitation

7 Tips for Facial Muscle Activation Mapping?

Interpreting Mapping Results for Assessment, Training, or Rehabilitation

Facial activation maps are not simple heat pictures. They show electrical activity captured through surface electrodes, often during smiling, blinking, puffing, or speech. Compare both sides first. A 2021 Global Burden of Disease analysis reported 101 million people living with stroke worldwide in 2019, making objective facial assessment increasingly relevant in rehabilitation. Still, one bright area does not prove stronger movement.

Check electrode placement, skin preparation, task timing, and baseline noise. The SENIAM recommendations for surface electromyography stress consistent placement and signal quality. Small placement changes can alter recorded amplitude. That matters around the mouth, where several muscles sit closely together. The map may look precise. It is not perfect.

Interpret results across repeated sessions, not isolated images. Record peak activation, onset timing, left-right difference, and unwanted co-contraction. A 2023 systematic review in Clinical Neurophysiology highlighted substantial variability in surface electromyography methods, limiting direct comparisons between studies. Use the same facial task, posture, instructions, and rest period each time. For training, seek smoother activation rather than maximum intensity. For rehabilitation, connect the map with facial symmetry, speech, pain, and functional goals. Numbers alone miss lived performance.

One caution remains. More signal is not always better. A patient may recruit excessive neck or jaw muscles while producing a weak smile. Experienced clinicians should combine mapping with examination and patient feedback, then document uncertainty instead of hiding it.

7 Tips for Facial Muscle Activation Mapping

Interpreting Mapping Results for Assessment, Training, or Rehabilitation

This illustrative surface-EMG profile uses normalized activation expressed as a percentage of each muscle’s maximum voluntary contraction (%MVC). Higher values indicate greater recruitment during the selected facial task.

Compare symmetry between sides, examine task-specific recruitment, and monitor changes across sessions. Persistent asymmetry, unexpected co-contraction, or low activation should be interpreted together with clinical examination and movement quality.

FAQS

What is facial muscle activation mapping?

It shows which facial muscles activate, when they activate, and how strongly. It combines surface electromyography, video, and gentle palpation.

What facial movements are commonly tested?

Common tasks include raising the brows, blinking, smiling, pursing the lips, and lowering the mouth corners. Watch the skin.

Which muscles can movement observation suggest?

Forehead lines may suggest frontalis activity. Narrowed eyelids may indicate orbicularis oculi involvement. A smile often lifts the mouth corners.

Why should a relaxed face be recorded?

A resting baseline helps separate normal tension from movement-related activation. Record it before testing.

How can mapping improve rehabilitation?

It can compare left-right symmetry, activation timing, and unwanted co-contraction. These details may guide safer, more targeted exercises.

Can a bright area on a map prove stronger movement?

No. Electrode placement, skin preparation, pressure, and signal noise can change the result. The image may look precise. It is not perfect.

Why should testing use repeated sessions?

One session can be misleading. Stress, caffeine, fatigue, lighting, and recent exercise may alter facial activity. Repeat unusual findings.

Does more electrical activity always mean better performance?

No. Excessive jaw or neck activity may accompany a weak smile. More signal is not always better.

Can mapping replace a clinical examination?

No. Trained professionals should combine measurements with visible movement, symptoms, and personal feedback. Numbers alone miss lived performance.

What makes a mapping protocol more reliable?

Use consistent posture, instructions, lighting, sensor placement, and rest periods. Document pain, fatigue, emotions, and uncertainty.

Conclusion

Facial muscle activation mapping is a practical method for observing and documenting how different facial muscles respond during movement. This guide explains how to prepare the face, organize basic tools, and identify consistent reference points before beginning. It then introduces movement-based observation, such as raising the eyebrows, closing the eyes, smiling, frowning, or moving the lips, to help distinguish the activity of major facial muscles without relying on assumptions.

The process also emphasizes recording each activation pattern under consistent facial expressions, lighting, posture, and observation conditions. By comparing repeated movements, users can recognize differences in muscle timing, strength, coordination, and symmetry. The resulting map may support facial assessment, movement training, communication studies, or rehabilitation planning. Careful documentation and a repeatable method are essential, while interpretations should remain cautious and, when necessary, be reviewed by a qualified professional.

Elara

Elara

Elara is a professional marketing specialist dedicated to helping businesses understand how thoughtful products, reliable service, and meaningful innovation can create lasting value. With a strong command of the company’s product portfolio, industry applications, and customer needs, Elara......